
LAUNCH
We launched our balloon and this is what happened on our journey. And here is how most of the journey went down.
Welcome to the internet home of Andrew Wilkie
We launched our balloon and this is what happened on our journey. And here is how most of the journey went down.

Here is what some of the code looks like, and what the overall software is meant to do during flight.

Along with the software written to go on the microcontroller we have written some software to visualise the data coming back to the base station from the microcontroller.
The data visualiser has a map, compass, and a few other data displays.
The map will display an area around the balloon payload based on the coordinates provided by the GPS module on the payload. the map images are gathered from Google, using URL image capturing, this essentially means the program will convert the coordinates from the balloon into Google Maps coordinates, create a URL and copy the image from that URL.
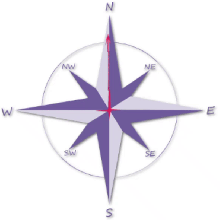 Compass
 Magnetometer data is fed into the visualiser from the balloon and is superimposed onto a representation of a compass. This data will provide us with a rough idea of which way the payload is facing. We can’t get a perfect direction due to the fact that magnets and the magnetic fields of the Earth, but even if it isn’t perfect, it still provides us with an idea and looks pretty.

The visualiser has a 3D cube in next to the Compass and this represents the payload. The cube is able to rotate, flip, mimicking the behaviour of the balloon payload.
Along with all of the visual interpreted data there is a live data output. all of the data displayed in this section comes directly from the senors. The data includes measurements from the 9DOF and barometer and also has the GPS coordinates. Once all of these values are received they are converted into understandable number – including G’s, metres, and degrees Celsius – if the values aren’t already understandable.
The last function the visualiser has is the ability to display data from a saved file or live from a COM port. To read from the serial port the program accesses the ports through the Serial library. the serial library allows python to read, write and manipulate data coming in and out of the COM ports. The other method of displaying data is to come from a file. The only files the visualiser reads are .csv or comma separated values. the reason for this is because of how easily the values are to be read. each value for one frame will be on one line and every components output will be one value in that line.
So all together the visualiser ill look like the image below. It is still in development and has a lot of tweaks to be made, but it is getting there and should have enough functionality for it to be useful during our balloon launch and afterwards during data analysis.


The clock is counting down and here is what we have completed and we still need to do before we can launch this balloon.

Testing some prototypes can be expensive, so we decided to simulate what the hardware and software would go through to see the effects and find bugs (unexpected features) in the software.

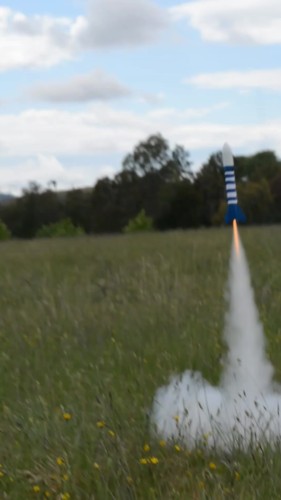
In preparation for our balloon launch, we built and launched a rocket to test the sensors that will be on our balloon’s payload.
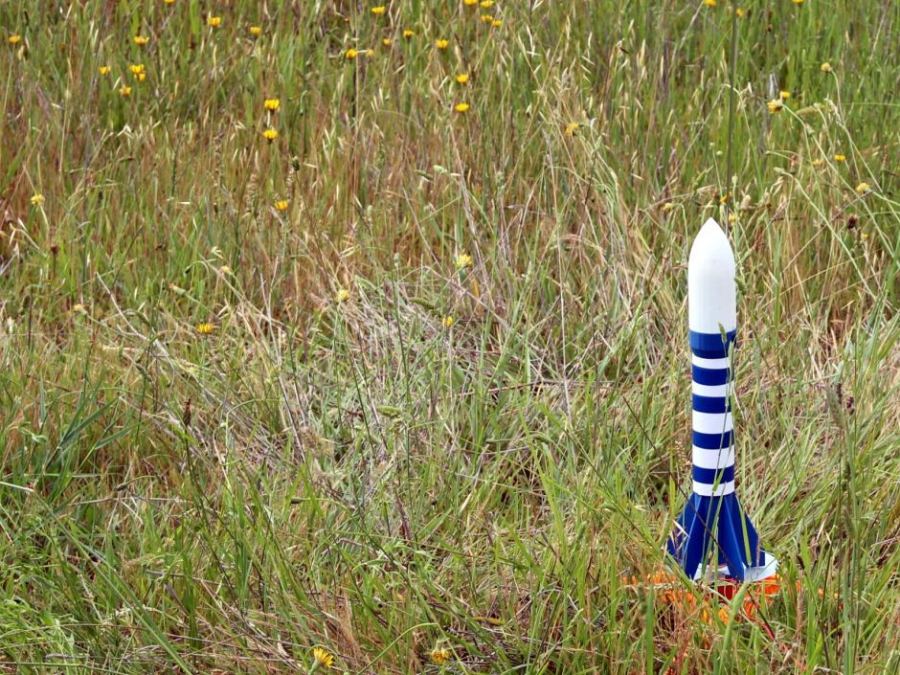
As part of the rocket science unit in our mechatronics course, we learnt about the specific design of a rocket could have such a large impact on the flight, apogee and making sure it doesn’t explode – thankfully, ours didn’t. Who knew that the number and length of the fins could effect the flight so much?
It also gave us the opportunity to use 3D printing software to create the exact rocket design that we desired.

3D printing most of the components gave us the ability control where everything goes in the rocket as well as how the rocket behaves during its flight. The nose cone was designed to house the payload and also designed to come off to release the parachute. The fins at the bottom contained the rocket motor and lid into the body of the rocket, which was a fancy cardboard tube, and had plenty of room to house the parachute and fit the nose cone payload on the top.
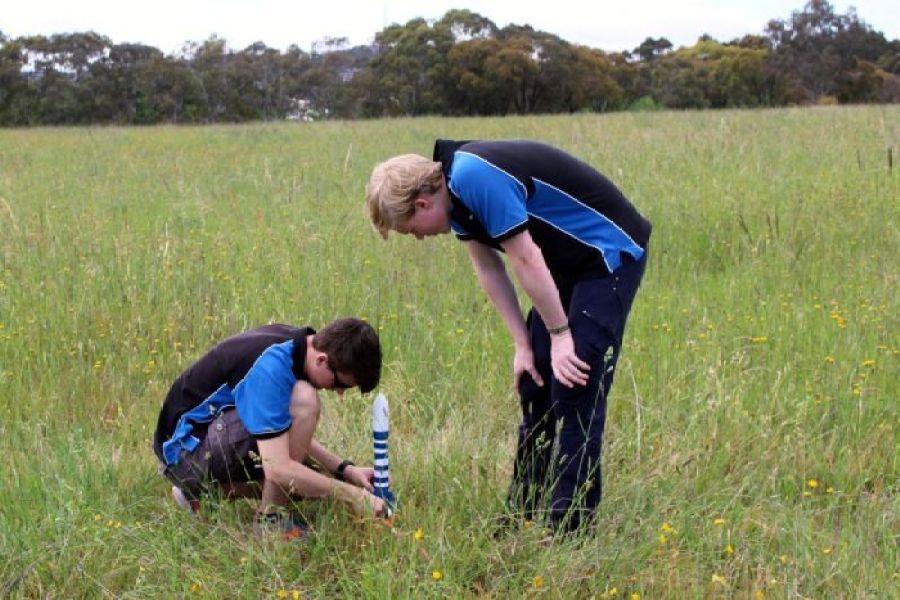
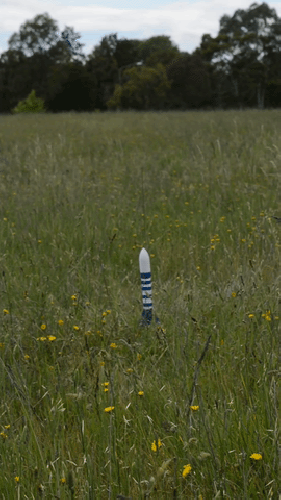
The payload was an opportunity to test almost everything that was going to go up in the balloon. It also allowed us to change, remove and add certain components to figure out the best devices to use in our balloon payload.
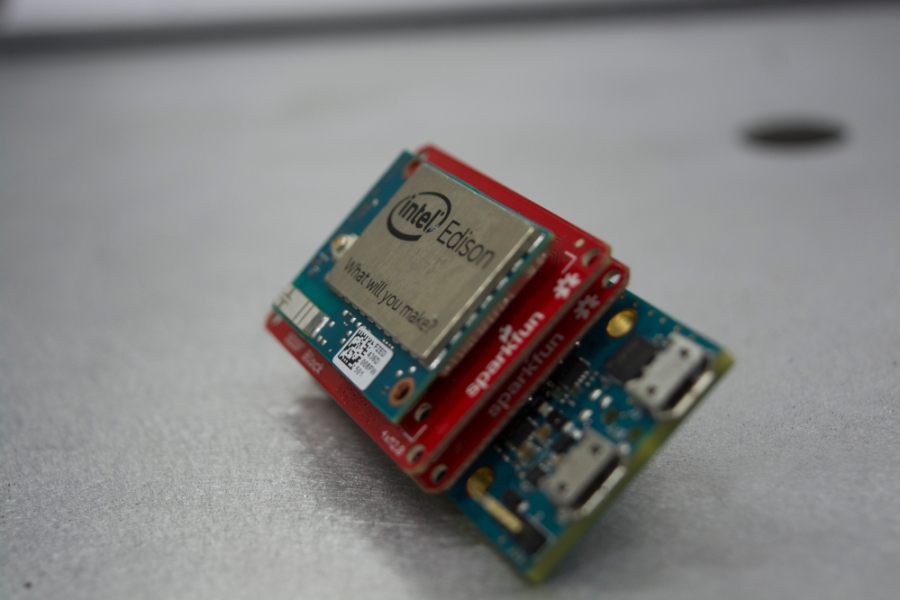
Our payload contained: a micro-controller (Intel® Edison), 9 Degrees of Freedom (9DoF), barometer and an SD card. This payload was the very first prototype of all of the essential electronics, helping us to test some of the logging software, to understand the type of data we receive and indicated that it all works together.
While an unfortunate break in solder prevented us from saving the data onto the SD card on the first launch, after much probing around with a multimeter and double-checking the code we managed to fix the problem, and successfully got it going on the 2nd launch. Facing challenges like this out on the field was daunting, but ultimately gives us the experience of debugging and solving problems on the fly, and preparing us for similar situations if something were to go wrong at the balloon launch.
We also had the privilege of being interviewed by Louise Maher from the ABC. To listen to the interview or find out more, go here.

After several delays the rocket was launched by student Madeleine Mackey. – Lake Ginninderra, ACT (666 ABC Canberra, Louise Maher)
The rocket launch gave us a clear picture of the work that still needed to be completed and how tough this project might actually be, especially trying to balance school and work. But we are on track; our logging software complete, steering algorithm basically done and the circuit board being soldered up this week. We will be ready to launch in under 32 days.


YICTE – Young ICT Explorers. YICTE is a competition run all around Australia getting students who love ICT and anything in general apply their knowledge and abilities to solve real world issues.
We decided to make this project extra special by design almost everything from scratch, this includes the circuit board.

Building a circuit take quite a bit of time and effort. A schematic has to be constructed – which is a diagram showing the links between all of the electronics. A prototype should be built and tested, the schematic refined and then finally the PCB (Printed Circuit Board) designed and manufactured. With our project the schematic has already been designed and shouldn’t vary too much.
Below is the schematic that our circuits will be based upon. It is a little messy but it visually shows us the connections between the components as well as which components will be on the PCB and which components will be off the board, but still connected to it in some form.
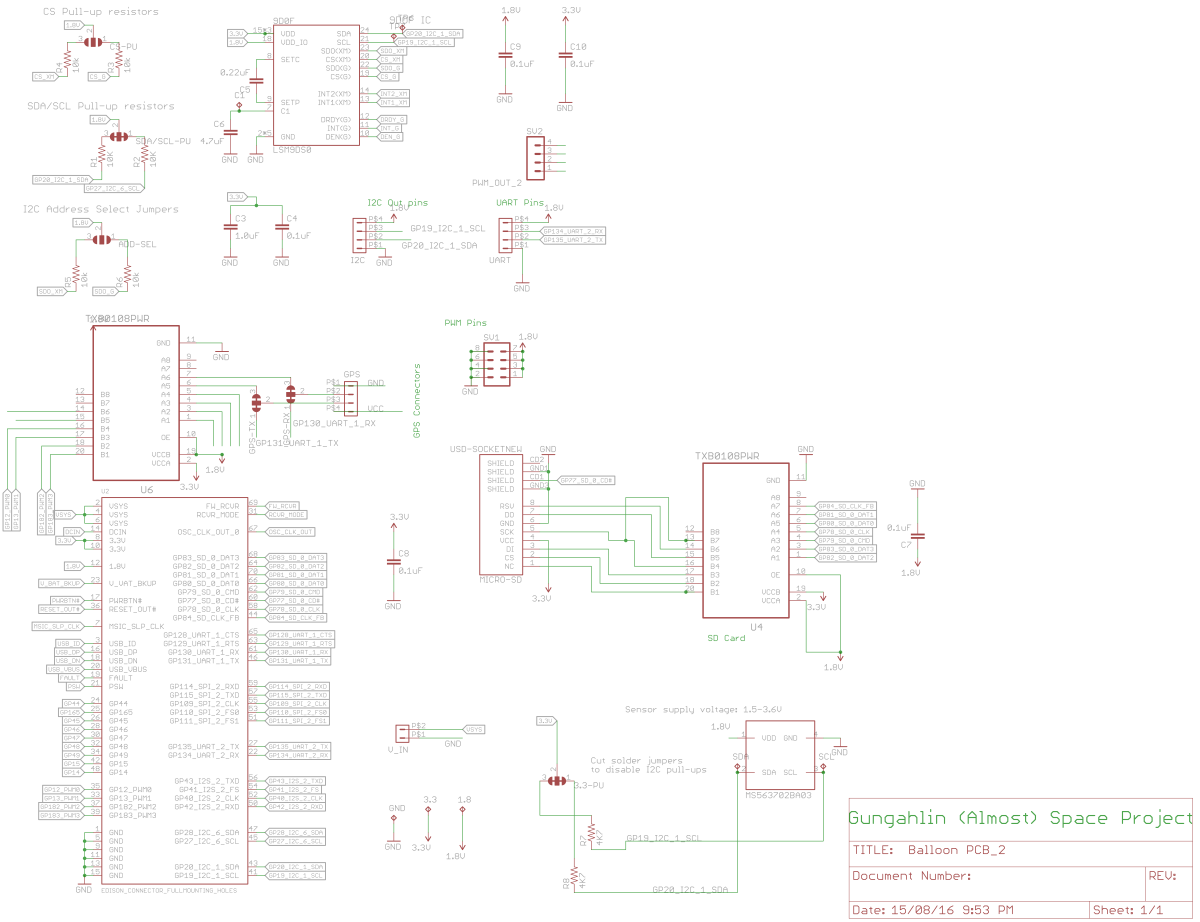
From here the plan is to turn this schematic or into a PCB design file. This will allow us to to send to board to a company to be manufactured. This will allow our project have a small circuit board no too much larger than the micro-controller itself. All of these little things combined will help ensure the project has a high standard, has a small mass and has everything we require without anything too big or unnecessary.

We’ve started working on the data logging side of the software, and a working prototype will be complete – of both software and hardware – in time for our YICTE competition entry. We have decided on using C++ and Arduino as the programming languages for the software. …